How To Design A Beautiful Succulent Rock Garden
By Gardenidea · Updated June 2026 · 14 min read
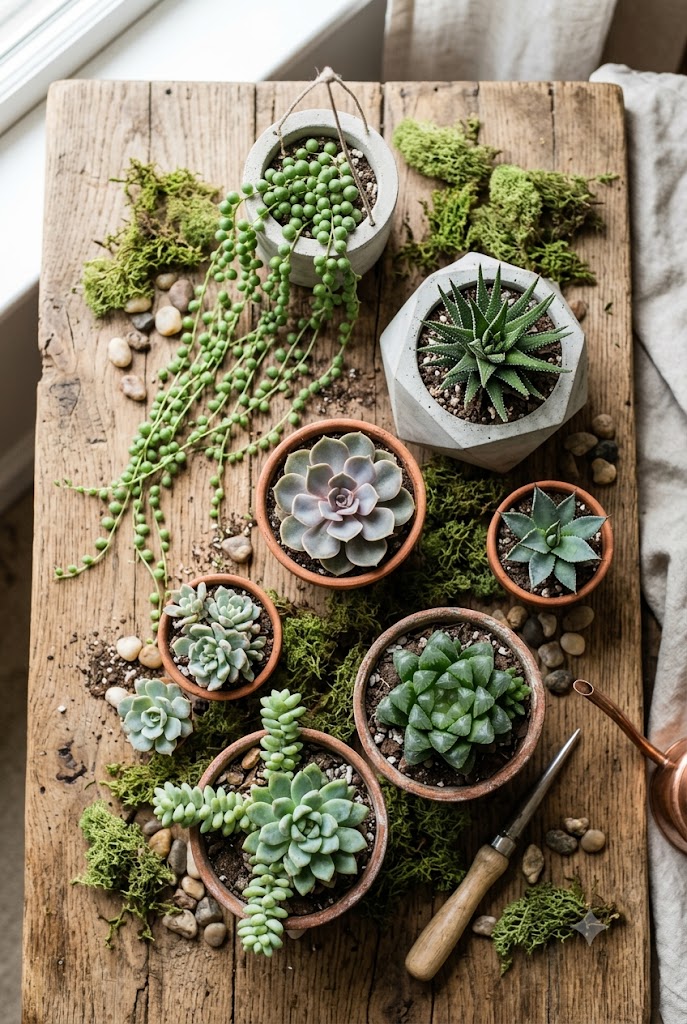
To design a succulent rock garden, pick a sunny, well-drained spot, build a raised mound or berm with fast-draining soil, then place large boulders first as focal points before filling in with medium stones and gravel. Plant drought-tolerant succulents like sempervivum, sedum, and echeveria into the pockets between rocks, working from tallest plants in back to ground-hugging varieties along the edges, then top-dress with gravel mulch to finish the look.
AI Summary — Key Facts
- Choose a site with 6+ hours of sun and natural or built-in drainage
- Mound soil into a raised berm so water sheds instead of pooling
- Place the largest boulder first, then layer medium and small stones around it
- Use 50–70% mineral soil mix (perlite, pumice, coarse sand) for drainage
- Top-dress with 2–3 inches of gravel to suppress weeds and finish the look
- Sempervivum and sedum are the most cold-hardy rock garden succulents
- Most rock gardens look established within one growing season
Key Takeaways
- Drainage is the single most important factor in a successful rock garden
- Rock size and placement should look natural, not lined up or symmetrical
- Mixing rosette, trailing, and architectural succulents adds visual depth
- Gravel mulch reduces weeding and watering at the same time
- Climate determines which succulents can stay outdoors year-round
- Slopes and hillsides are ideal, low-maintenance sites for a rockery
- Small rock gardens can be built in a single weekend with basic tools
A succulent rock garden pairs two of the lowest-maintenance elements in landscaping — drought-tolerant succulents and natural stone — into a design that looks intentional in every season and barely needs watering once established. Unlike a traditional flower bed, a well-built rockery actually gets better with less fuss: the rocks hold heat, the gravel keeps roots dry, and the succulents slowly spread to fill every gap. Whether you are converting a patch of struggling lawn, dressing up a slope that is hard to mow, or building a small accent bed by the front door, the same core principles apply. This guide walks through site selection, drainage, rock selection, a full step-by-step build, and 30 detailed ideas covering plant choices, layout styles, and finishing touches for succulent rock gardens in any climate.
| Rock Garden Style | Best Climate | Key Plants | Rock Type | Maintenance |
|---|---|---|---|---|
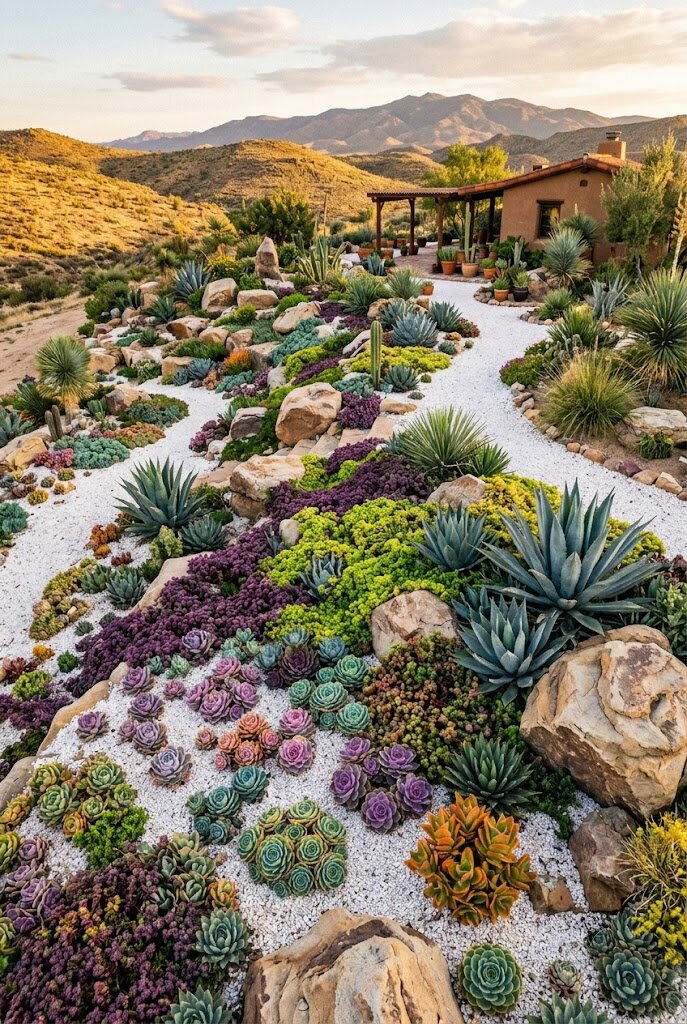
| Alpine Rock Garden | Cold, zones 3–7 | Sempervivum, sedum | Fieldstone, gravel | Low |
| Desert Rock Garden | Hot & dry, zones 8–11 | Agave, echeveria, cactus | Decomposed granite, boulders | Very low |
| Zen / Japanese Garden | Any climate | Sedum, moss, dwarf shrubs | Raked gravel, smooth stones | Moderate |
| Mediterranean Rockery | Mild & dry, zones 8–10 | Aeonium, sedum, lavender | Limestone, terracotta accents | Low |
| Cottage Rock Garden | Temperate, zones 5–9 | Mixed succulents, perennials | Mixed fieldstone | Moderate |
Table of Contents
What Is a Succulent Rock Garden?
A succulent rock garden, also called a rockery or alpine bed, is a landscaped area where natural stone and drought-tolerant succulents are combined to mimic the look of plants growing wild among boulders and gravel. The rocks are not just decoration — they raise the planting area for drainage, reflect heat back onto cold-sensitive plants, and create sheltered pockets where succulent roots stay dry between waterings.
Rock gardens originated as alpine plant displays in cooler climates, but the style has expanded to include desert, Mediterranean, and Japanese-inspired versions, all built around the same idea: tough, low-water plants set into a structured arrangement of stone. Because succulents store their own water and need very little soil depth, they are some of the best plants available for this style of garden.
The appeal goes beyond looks. A succulent rock garden typically uses 70 to 90% less water than a comparable lawn area, rarely needs mowing or fertilizing, and resists most pests and diseases that affect leafier garden plants — making it one of the most practical landscaping upgrades for busy homeowners.
How Do You Design a Succulent Rock Garden Layout?
Start by sketching the space and noting sun exposure, slope, and any existing drainage problems before placing a single rock. Most successful rockeries follow a simple rule: place the largest, most attractive boulder first as the anchor point, usually off-center rather than dead in the middle, then build outward with progressively smaller stones.
Group rocks in odd numbers (three or five) rather than even pairs, and bury roughly one-third of each large rock so it looks like it has always been there rather than recently dropped on top of the soil. Leave irregular gaps and pockets between stones — these become the planting spaces for your succulents.
For plant placement, use the classic landscaping triangle: tall, architectural succulents (agave, tall echeveria) toward the back or center for height, mounding rosettes (sempervivum, smaller echeveria) in the middle layer, and trailing or mat-forming varieties (sedum, ice plant) along the front edges and crevices where they can spill over stone naturally.
What Is the Best Soil and Drainage Setup for a Rock Garden?
Drainage decides whether a succulent rock garden thrives or rots. The most reliable approach is to build a raised mound or berm 8 to 18 inches high using a soil mix of 50 to 70% coarse mineral material (perlite, pumice, or coarse sand) blended with organic potting soil or compost. The extra height alone dramatically improves drainage compared to a flat, ground-level bed.
Avoid standard topsoil or moisture-retaining potting mixes entirely — they hold water around the roots and are the leading cause of rotted succulents in rock gardens. If your native soil is heavy clay, it is worth completely replacing the soil in the planting pockets rather than trying to amend clay in place.
Finish with a 2 to 3 inch layer of gravel or decomposed granite over the soil surface. This top-dressing keeps moisture away from plant crowns and stems, suppresses weed seeds, regulates soil temperature, and gives the entire bed a clean, finished, professional appearance.
Which Rocks Work Best for a Succulent Rock Garden?
Use a mix of three rock sizes: boulders (12 inches or larger) as focal points, fieldstone or flagstone (4 to 12 inches) to define planting pockets and edges, and gravel or decomposed granite as the top-dressing layer that ties everything together visually.
Local, native stone almost always looks more believable than imported decorative rock, and it is significantly cheaper since it does not need to be trucked in from far away. Matching the stone color and type already present in your region — granite, limestone, sandstone, or river rock — helps the finished garden look like it belongs rather than appearing artificially placed.
Be cautious with very dark rock in hot, full-sun climates, since dark stone absorbs heat and can scorch sensitive succulent leaves that sit directly against it. In cooler climates, dark rock is actually an advantage — it stores daytime heat and releases it slowly overnight, protecting marginally hardy succulents from frost damage.
30 Succulent Rock Garden Ideas, Layouts & Plant Picks
From site prep and rock placement to the best succulent varieties for every climate — every idea below includes a specific technique, plant, or design detail you can use in your own rockery.
1. Choosing the Right Site: Sun, Slope, and Drainage
The single biggest factor in a successful succulent rock garden is site selection, not plant choice. Look for a spot that receives at least 6 hours of direct sun and sits slightly higher than the surrounding ground, since water naturally drains away from elevated areas instead of pooling around plant crowns. South- or west-facing slopes are ideal in most of the United States, Canada, the UK, and Australia. Avoid low spots near downspouts, areas that stay shaded most of the day, and any place where you have noticed standing water after rain — these locations will fight you no matter how well you amend the soil.
2. The Mounded Berm Method for Built-In Drainage
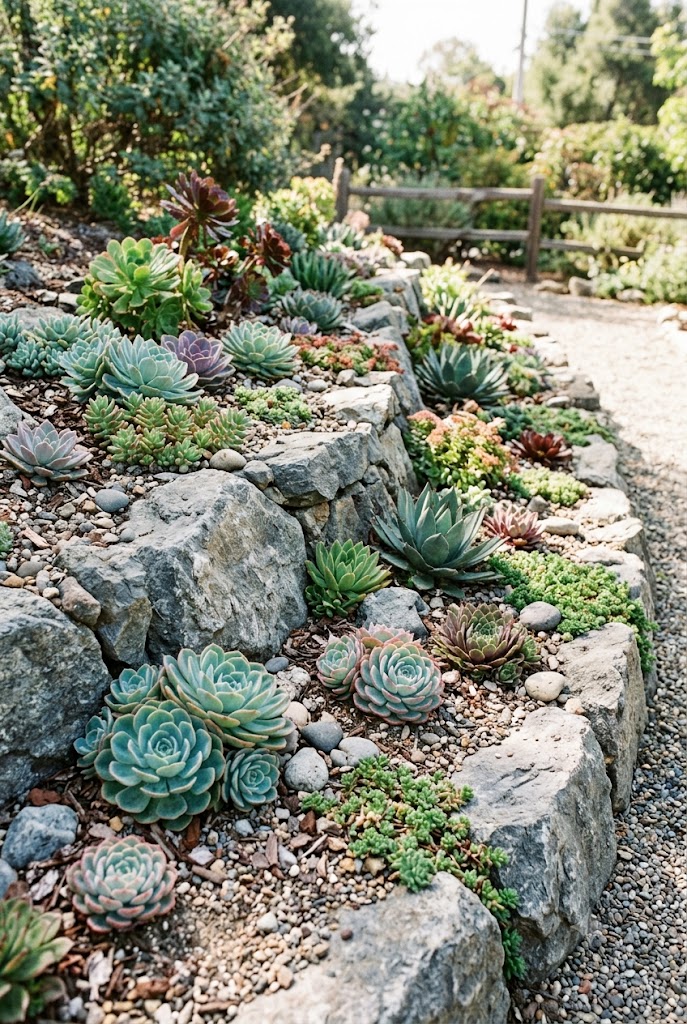
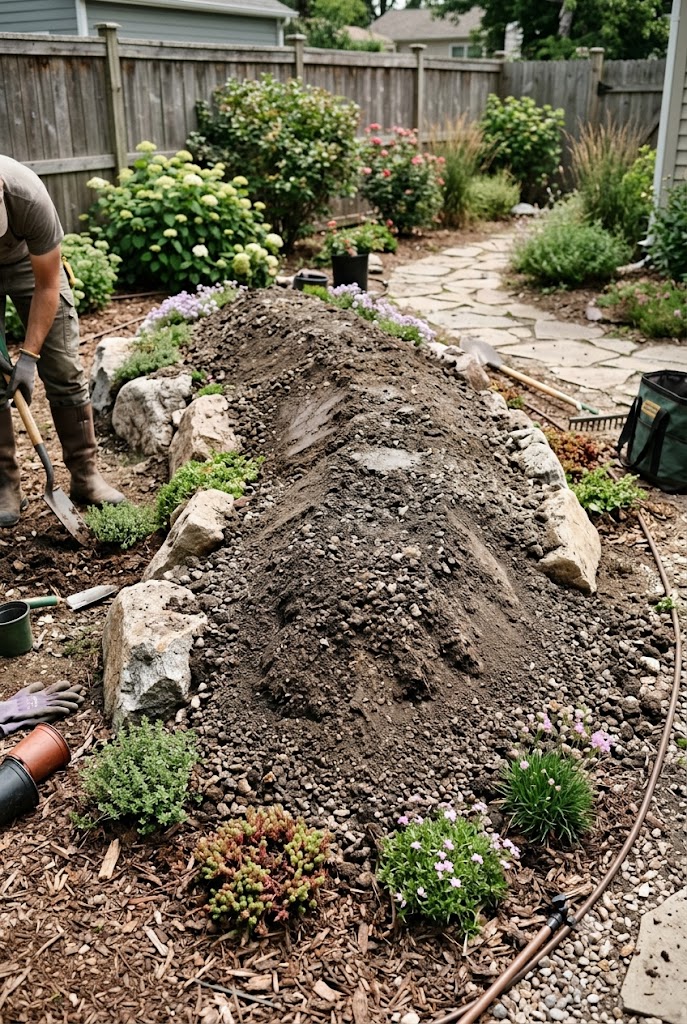
Instead of planting succulents into a flat, ground-level bed, mound the soil into a raised berm 8 to 18 inches high before adding any rock. This single step solves most drainage problems automatically, since gravity pulls excess water away from plant roots rather than letting it sit. Build the berm with a fast-draining mineral soil mix, then nestle rocks into the slope as you build so they look like a natural outcropping rather than a pile dumped on top. Berms also add visual height and movement to an otherwise flat yard, which makes the planting look more dynamic from every angle.
3. Choosing Your Rock Palette: River Rock, Flagstone, and Crushed Gravel
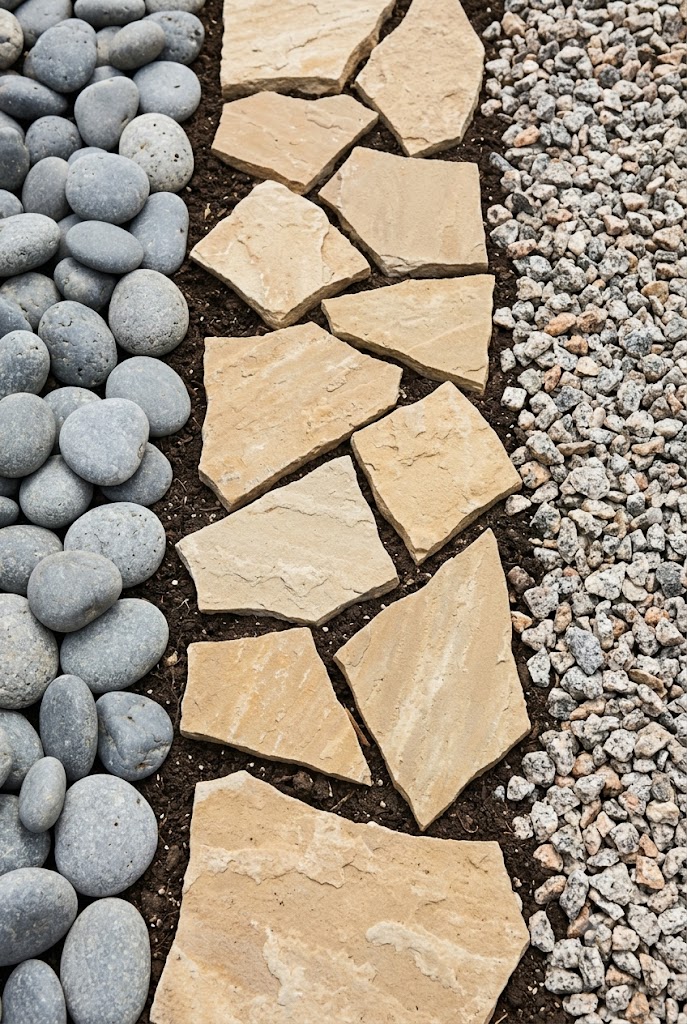
Mixing rock types by size and texture, rather than using a single uniform gravel, gives a rock garden far more visual depth. Smooth river rock works well along the lowest points of a design or anywhere you want a softer, water-worn look. Flat flagstone makes excellent stepping points and planting pocket edges. Crushed granite or pea gravel as a top-dressing ties the larger stones together and gives the whole bed a clean, finished surface. Choose two or three complementary rock types at most — too many competing textures can make a small garden look cluttered rather than curated.
4. Boulders as Focal Points: Scale, Placement, and Balance
Every successful rock garden has at least one boulder large enough to act as a true focal point — typically 18 inches or wider. Place it first, before any other rock or plant goes in, and choose its position intentionally: slightly off-center, partially buried, and angled so its most attractive face is visible from the main viewing point (a driveway, window, or patio). Balance one large boulder with a home's existing features; if a deck or entry sits to one side of the yard, anchor the boulder on the opposite side so the overall composition feels balanced rather than lopsided.
5. Echeveria Rosettes Tucked Between the Stones
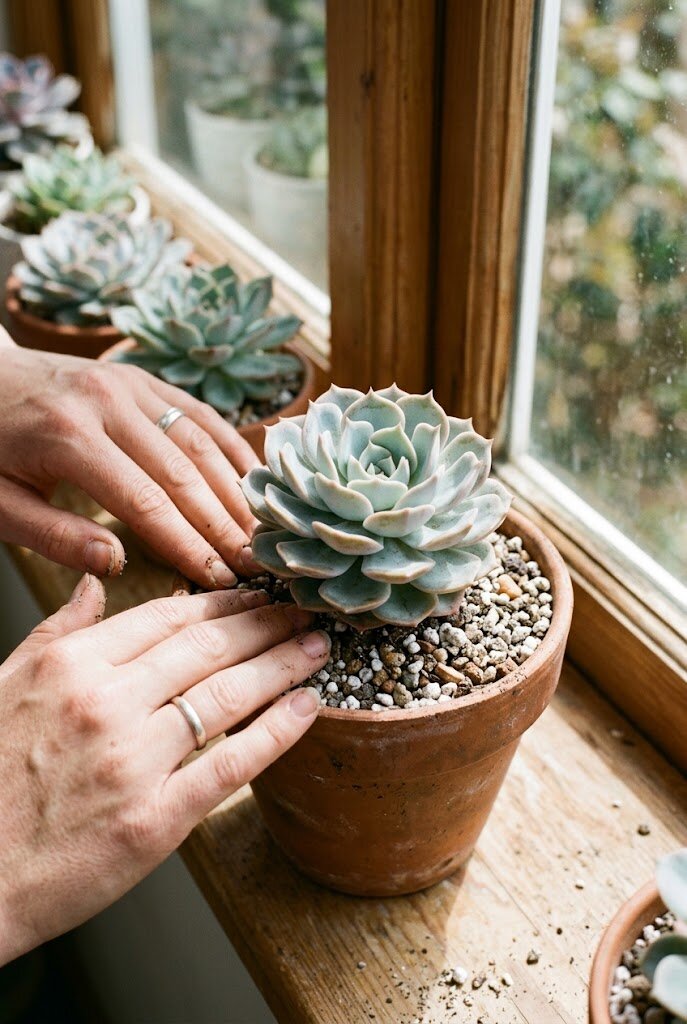
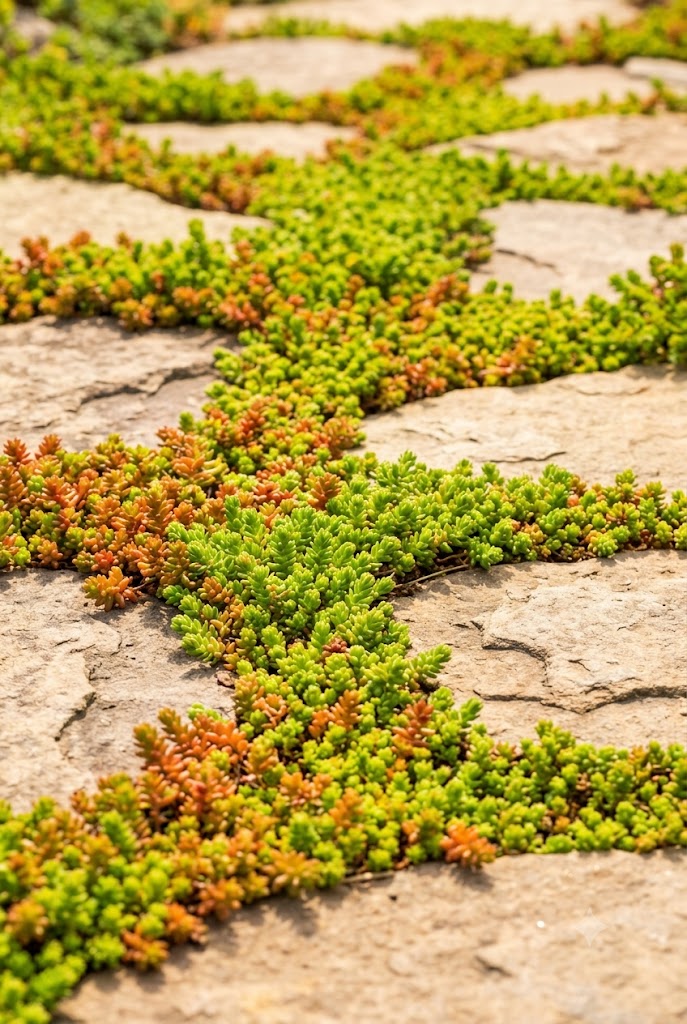
Echeveria's perfectly symmetrical rosettes in blue, rose, and coral tones look striking nestled directly against gray or tan stone, where the cool color contrast makes the plant's shape stand out. Tuck small to medium echeveria into pockets with at least 4 inches of fast-draining soil, angled slightly so rainwater runs off the rosette rather than collecting in the center, which can cause rot. Echeveria is best suited to warmer rockeries (zones 9 to 11 outdoors) or container-style rock gardens that can be moved or covered before frost.
6. Sempervivum (Hens and Chicks): The Cold-Hardy Rockery Classic
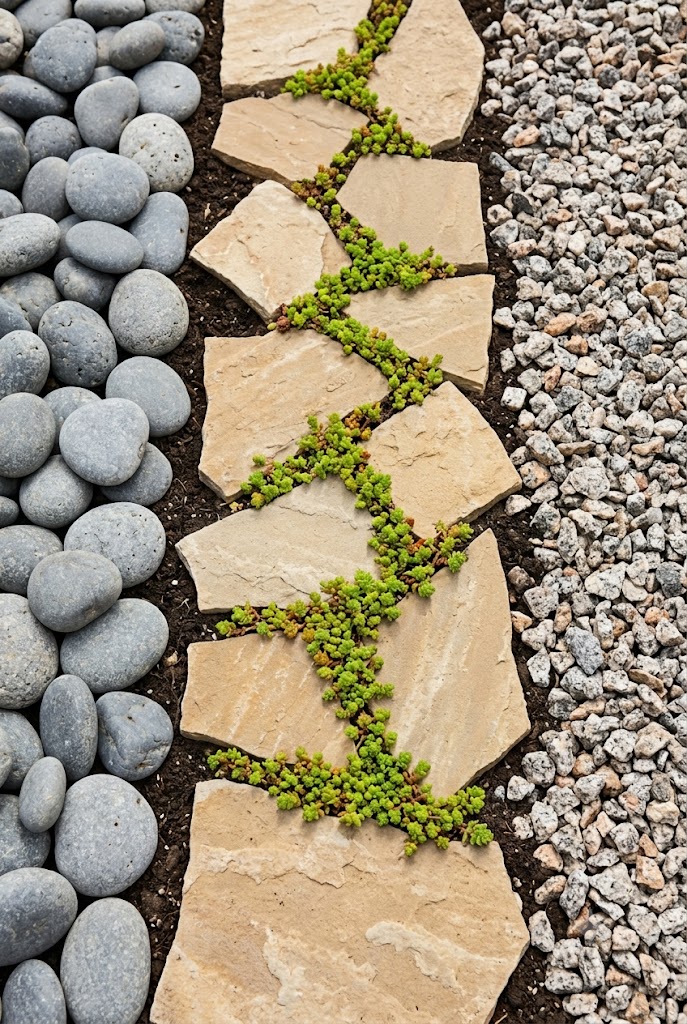
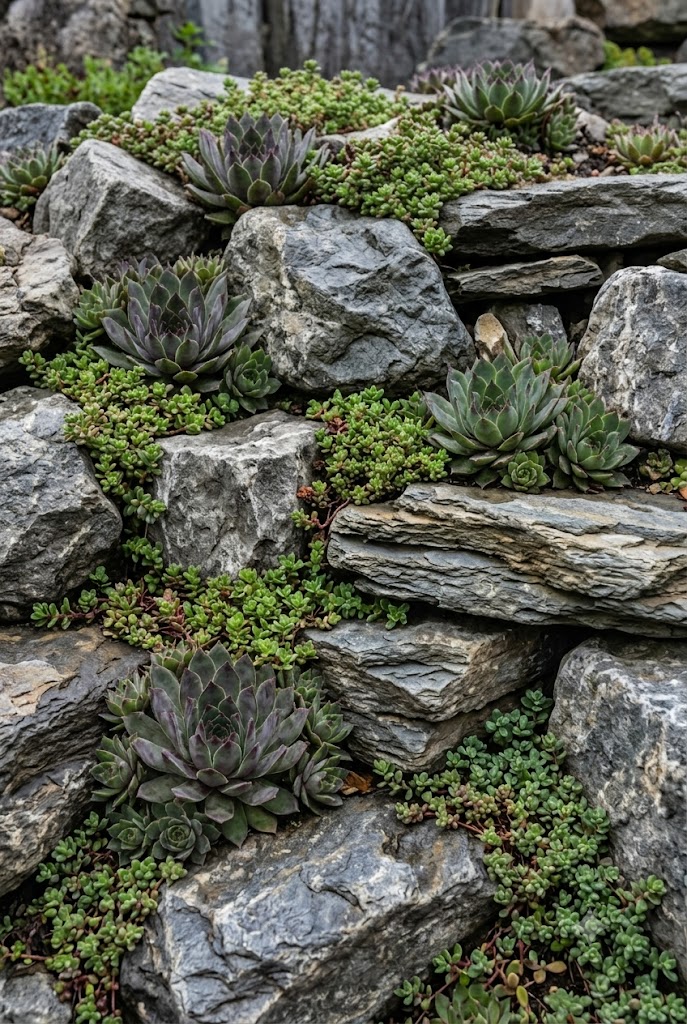
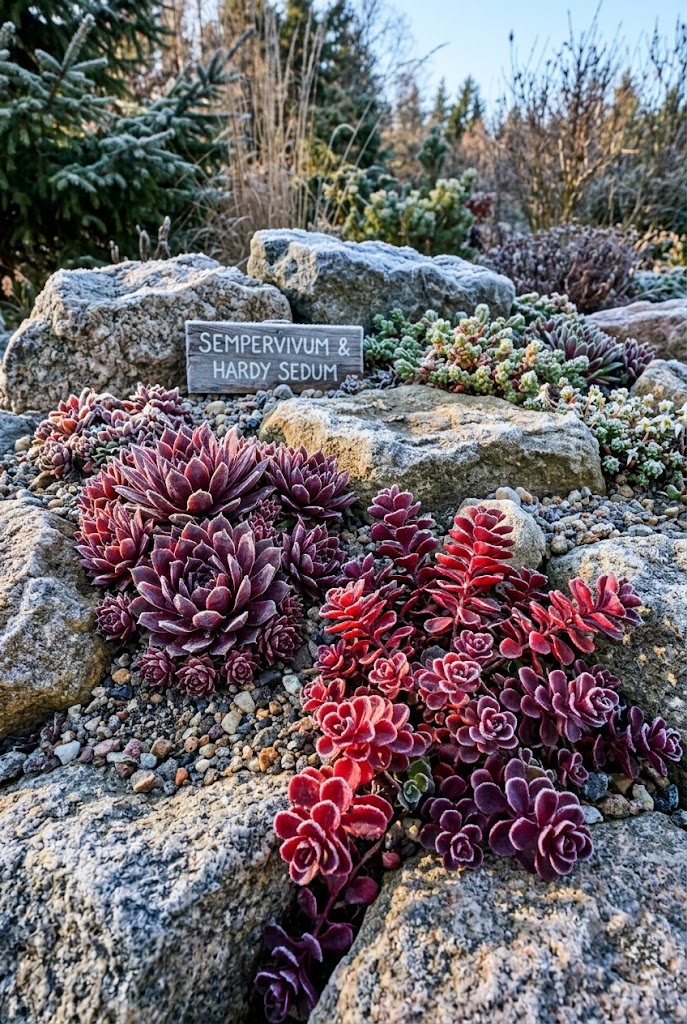
If you live anywhere with real winters, sempervivum is the backbone plant of a true alpine rock garden. Hardy to zone 3 in many varieties, hens and chicks tolerate snow, ice, and freezing temperatures that would kill almost every other succulent on this list. The "chicks" — small offset rosettes — spread steadily to fill gaps between stones over two to three seasons, eventually carpeting bare gravel with dense, ground-hugging color that ranges from green to deep burgundy depending on sun exposure and season.
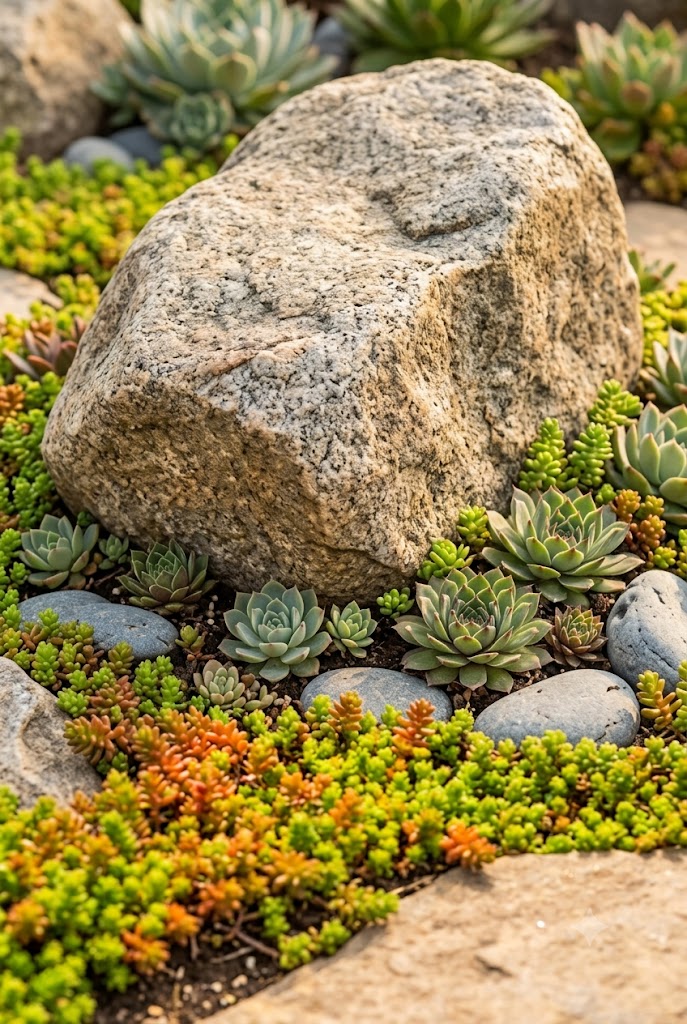
7. Sedum Ground Cover: Filling the Gaps With Color and Texture
Low, spreading sedum varieties are the easiest way to make a new rock garden look established quickly. Plant sedum directly into the narrow gaps between larger stones, where its shallow, wiry roots can grip without needing much soil depth. Varieties like 'Angelina', 'Dragon's Blood', and blue spruce sedum spread into a dense mat within one or two growing seasons, covering bare gravel and softening the hard edges of stone with low mounds of color that often shift with the seasons.
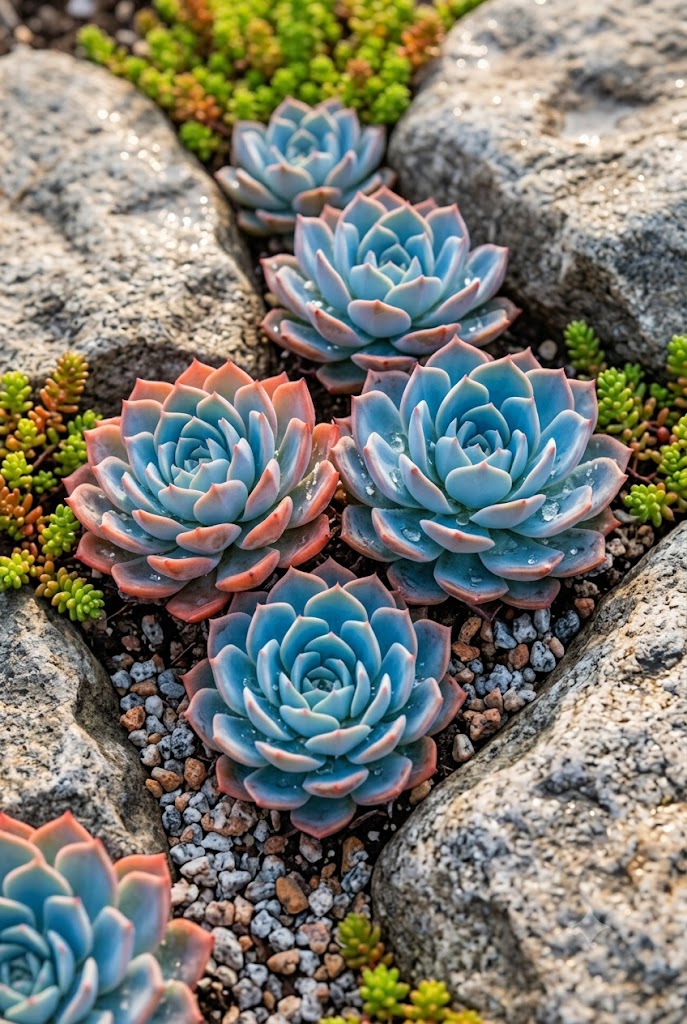
8. Agave as a Bold Architectural Anchor Among the Rocks
For a dramatic centerpiece, plant a single architectural agave near your largest boulder rather than surrounding it with small rosettes. The sharp, sculptural leaves of varieties like Agave americana or Agave parryi create strong visual contrast against rounded stone and read as a clear focal point even from across the yard. Give agave plenty of room to mature — many varieties eventually reach 3 to 6 feet wide — and plant it in the deepest soil pocket in the design, since its root system needs more depth than smaller rock garden succulents.
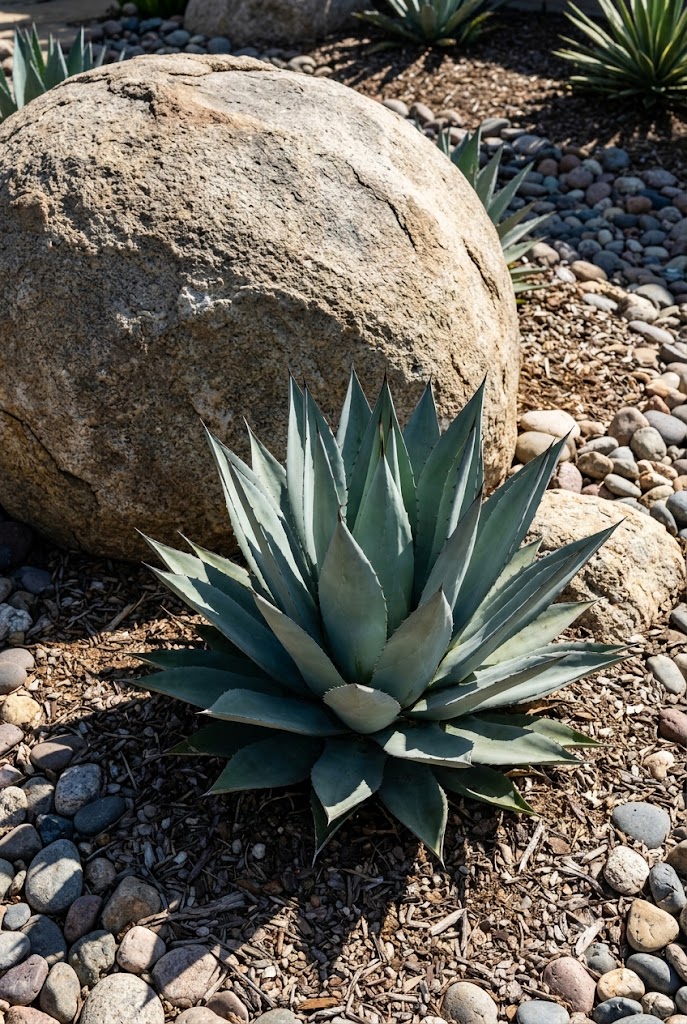
9. Layering Gravel Mulch for a Polished, Professional Finish
A 2 to 3 inch layer of gravel top-dressing is what separates an amateur-looking rock garden from one that looks professionally installed. Beyond the visual upgrade, gravel mulch keeps soil from splashing onto leaves during rain, regulates soil temperature, blocks light from reaching weed seeds, and keeps moisture away from succulent crowns and stems where rot typically starts. Choose a gravel size and color that complements your larger stones — pea gravel and decomposed granite are the two most popular choices for succulent rock gardens.
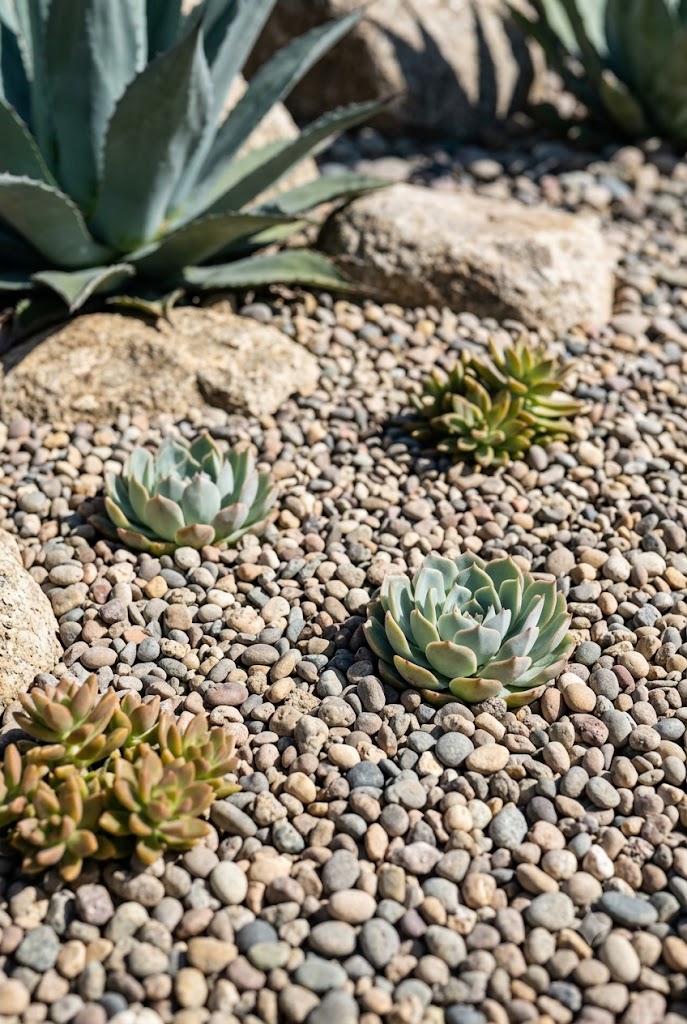
10. Three Rock Garden Layout Styles: Alpine, Desert, and Zen
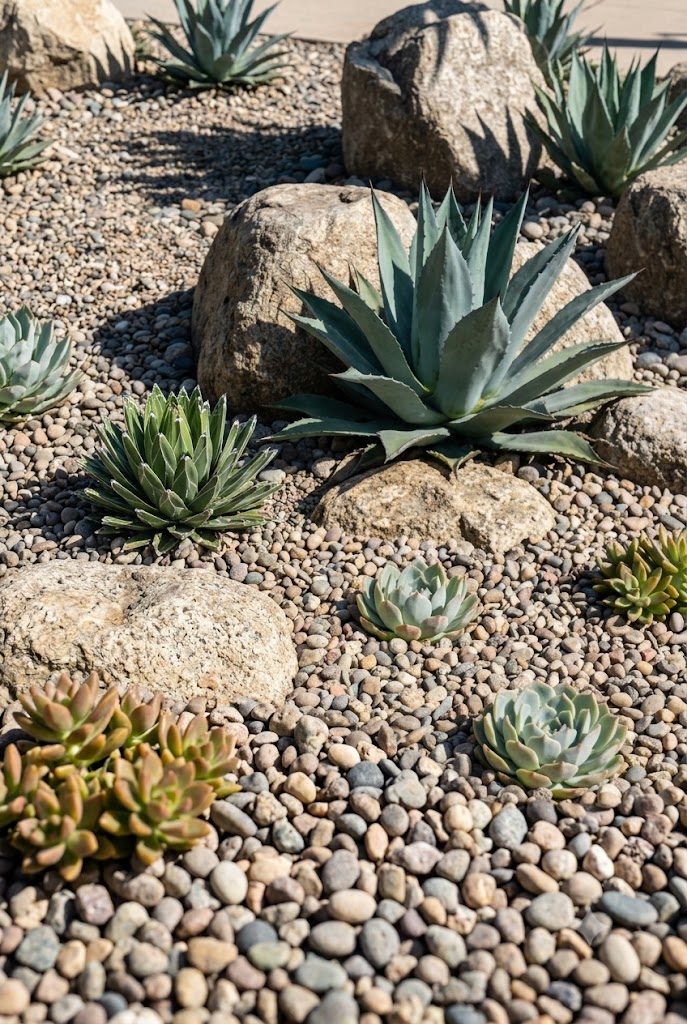
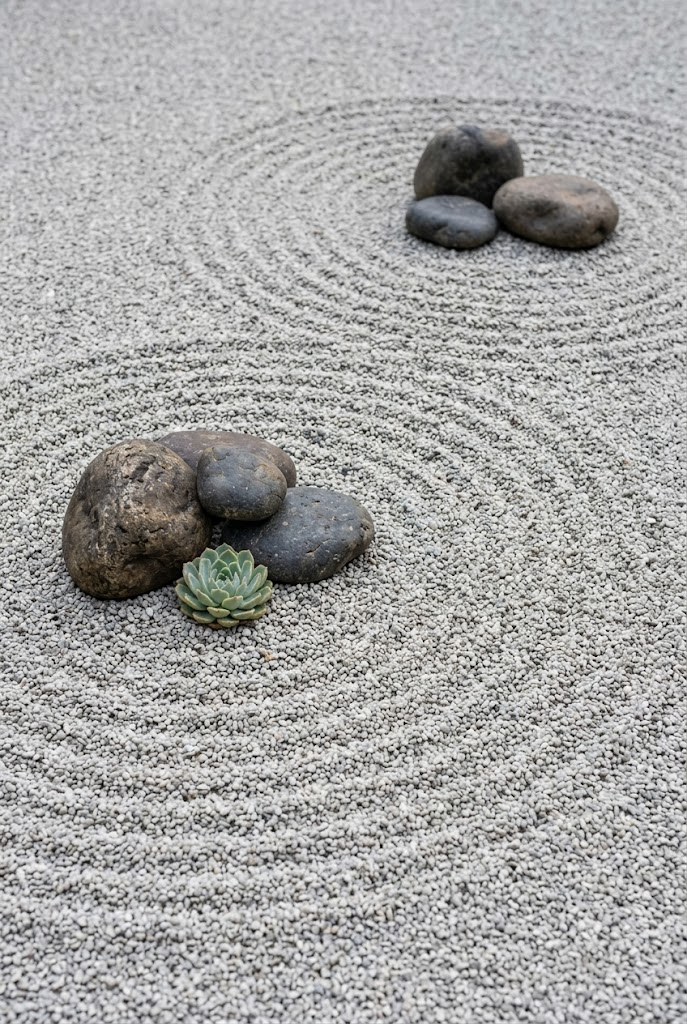
Not every succulent rock garden has to look the same. An alpine-style layout uses irregular fieldstone, cold-hardy sempervivum and sedum, and a slightly wild, mountainside feel. A desert-style layout favors decomposed granite, larger boulders, and architectural plants like agave and echeveria for a sun-baked, Southwestern look. A zen-style layout strips the planting back to just a few sedum or moss accents among carefully raked gravel and smooth stones, prioritizing calm, minimalist lines over plant variety. Pick the style that matches your climate and the rest of your home's landscaping for the most cohesive result.
11. Cactus and Succulent Combos for an Authentic Desert Look
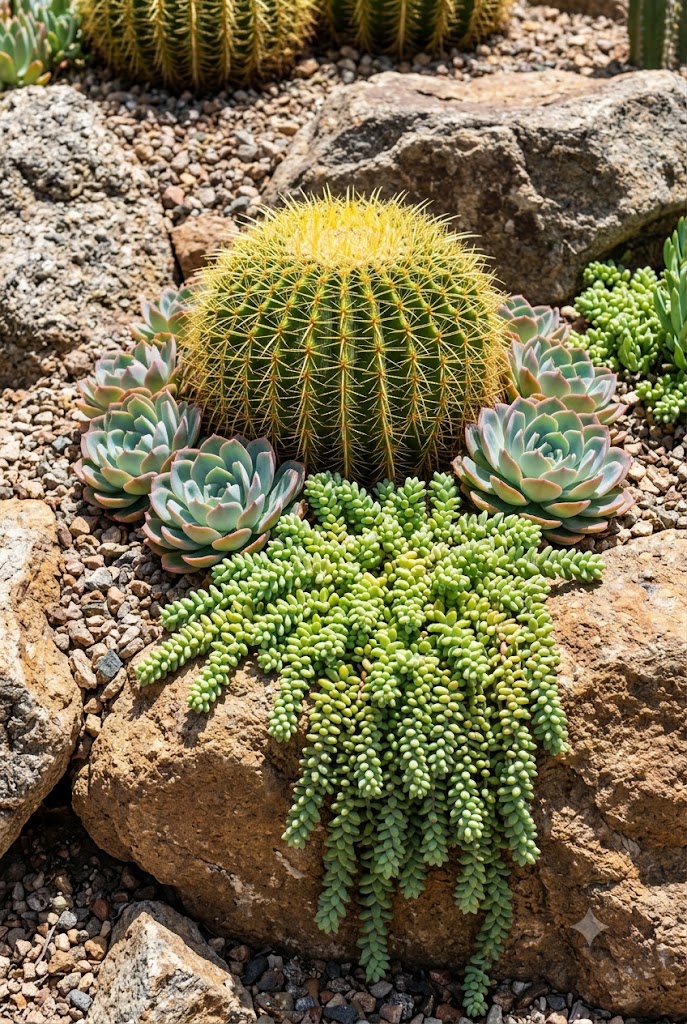
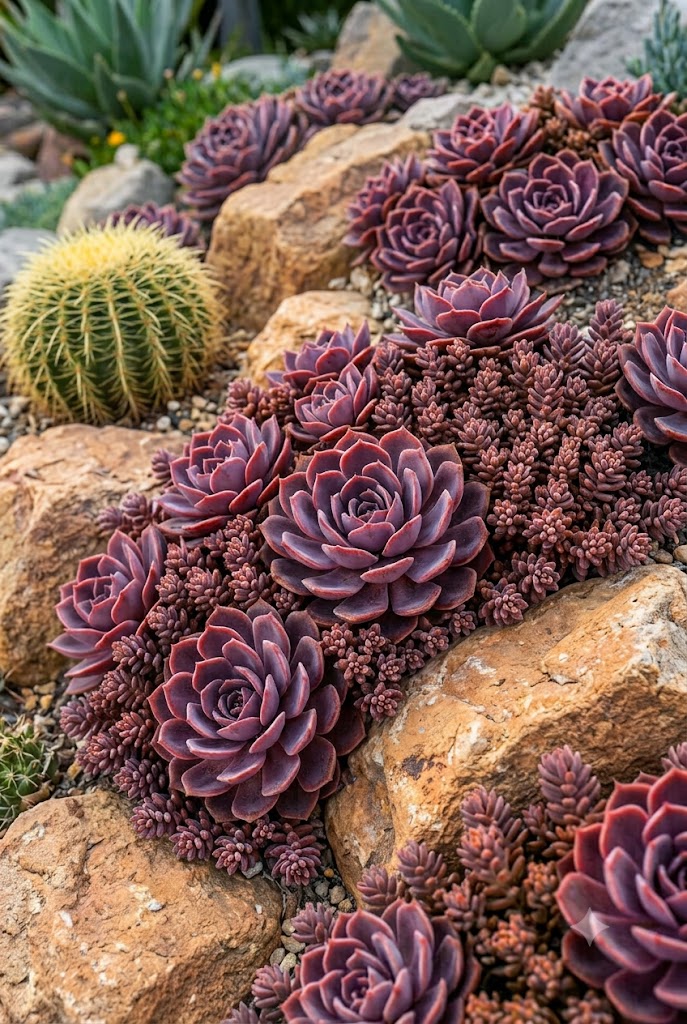
Pairing cacti with rock garden succulents creates a more authentic, layered desert aesthetic than succulents alone. Choose species with matching water needs — both cacti and most succulents thrive on infrequent, deep watering — and matching light requirements, since both perform best in full sun. A golden barrel cactus surrounded by echeveria and a spilling sedum, set among sun-baked boulders, reads as a complete desert vignette rather than a random plant collection. Leave extra spacing around cacti to avoid accidental contact with their spines during routine garden maintenance.
12. Lithops: The Living Stones That Disappear Into the Rocks
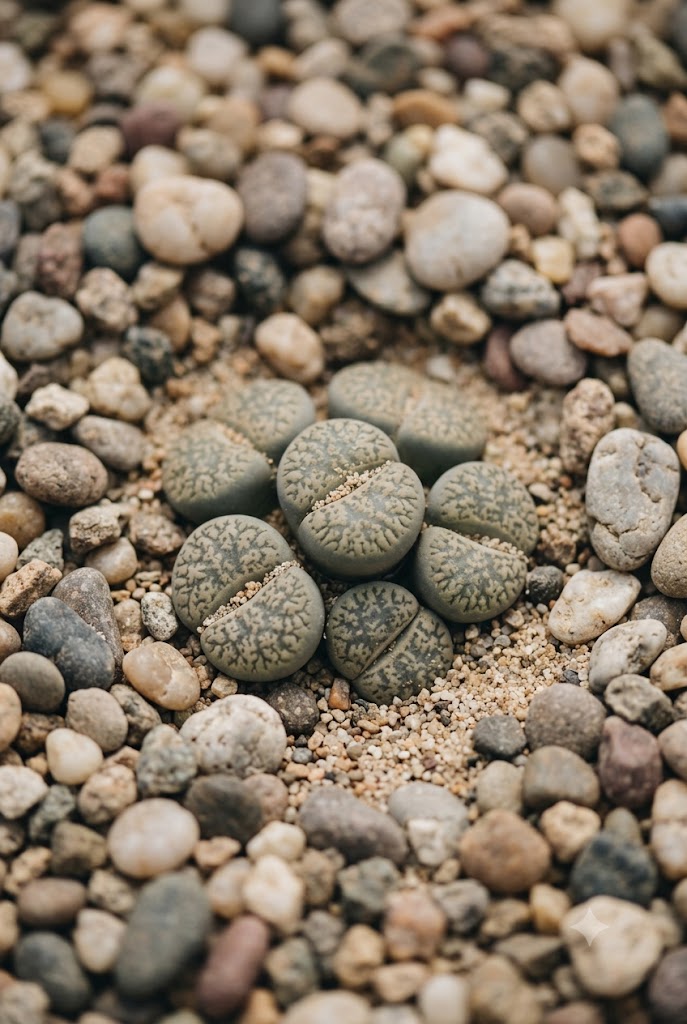
Lithops, commonly called living stones, are the ultimate novelty plant for a rock garden because they are camouflaged almost perfectly into the stone around them. Each plant is just two fleshy, patterned leaves that mimic the color and texture of small pebbles, splitting open once a year to reveal a daisy-like flower. Group several lithops together in a shallow, extremely fast-draining pocket of gravel and sand near smaller stones — planted near boulders, they tend to disappear; near pea gravel of a similar scale, they become a delightful "spot the plant" detail for visitors.
13. Creating a Dry Creek Bed Through the Garden
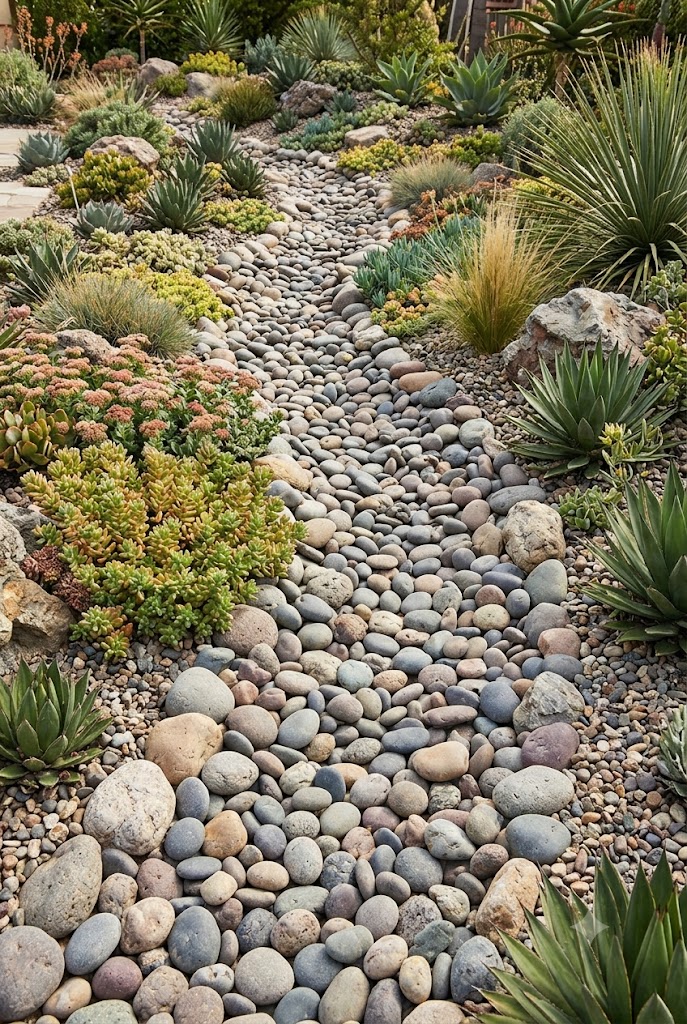
A dry creek bed adds movement and a built-in drainage path to a succulent rock garden, channeling rainwater away from planting pockets during heavy storms while looking attractive year-round. Dig a shallow, winding trench, line it with landscape fabric, then fill with rounded river rock graduating from larger stones at the "banks" to smaller pebbles in the center. Plant drought-tolerant succulents along the edges rather than directly in the channel, where occasional water flow could wash away shallow-rooted plants.
14. Stepping Stone Pathways Through the Rockery
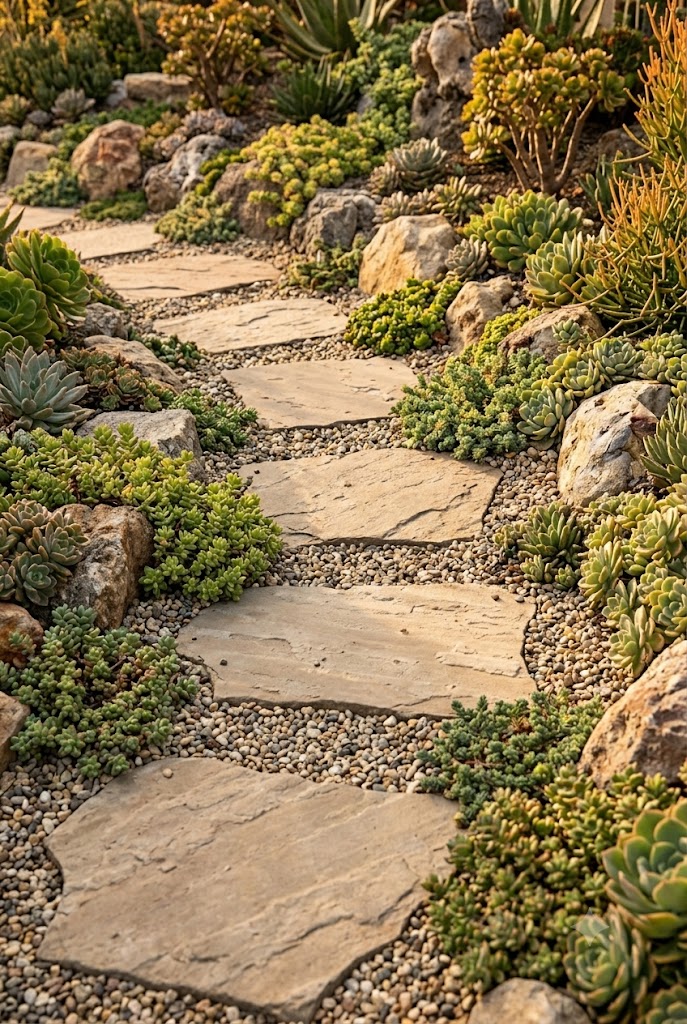
A path of flat stepping stones through or beside a succulent rock garden invites people to walk closer to the planting without compacting the soil or crushing low-growing succulents. Space stepping stones at a comfortable, natural walking stride (roughly 24 to 30 inches apart) and set them slightly into the gravel so they sit flush rather than as a tripping hazard. Plant low, traffic-tolerant ground cover like sedum directly along the path edges, where it will spill gently over the stone without blocking foot traffic.
15. Vertical Rock Gardens for Slopes and Hillsides
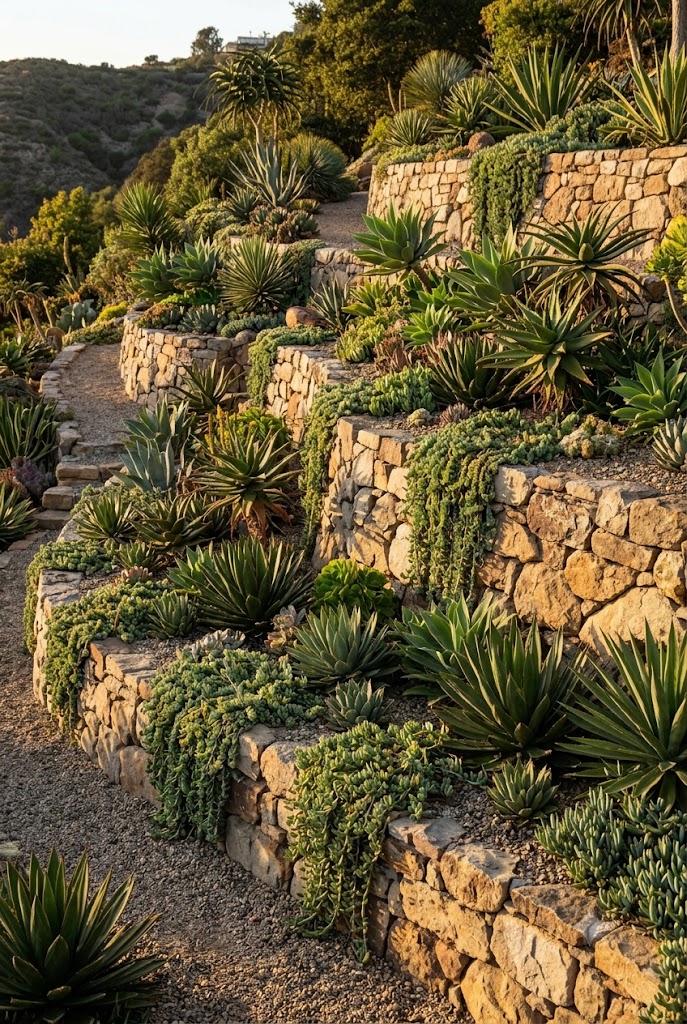
A sloped or hillside yard, often considered a landscaping headache, is actually one of the best possible sites for a succulent rock garden, since it already provides the drainage succulents need without any extra grading. Terrace steeper slopes with small retaining stones to prevent gravel and soil from washing downhill in heavy rain, then plant in a loose, naturalistic pattern that follows the contour of the hill rather than fighting it. This approach turns a hard-to-mow slope into a low-maintenance, high-interest feature instead of a liability.
16. Gasteria and Shade-Tolerant Succulents for Shaded Pockets
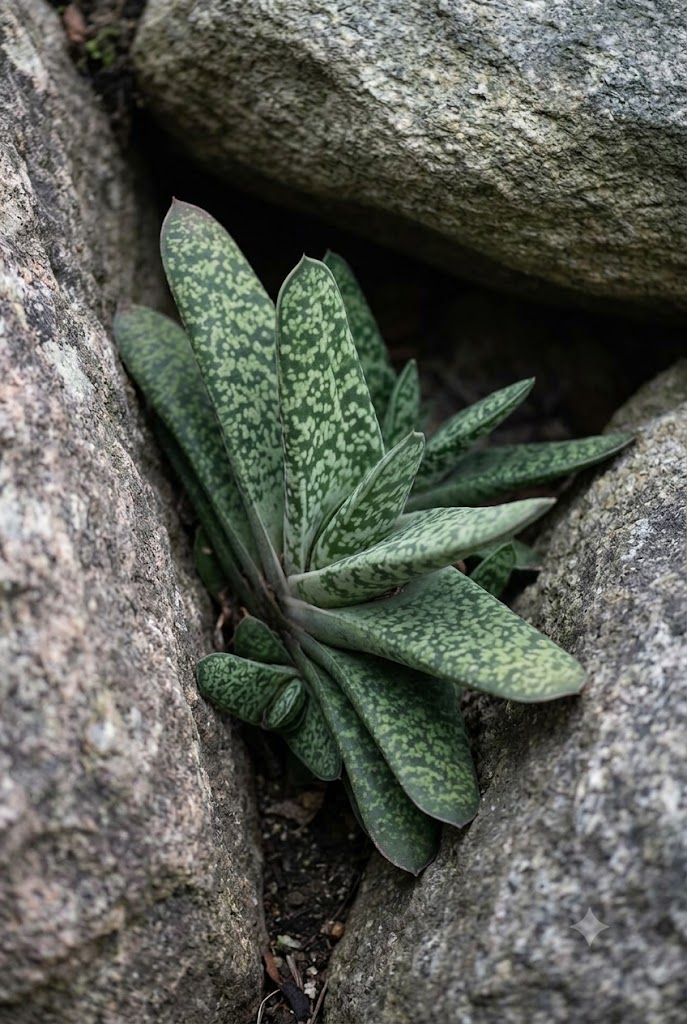
Not every part of a rock garden gets full sun, especially near a fence, wall, or mature tree. Gasteria, closely related to aloe, is one of the few succulents that genuinely tolerates partial shade, with thick, tongue-shaped, mottled leaves that add textural contrast to the rosette and spiky shapes found elsewhere in the design. Tuck gasteria and other shade-tolerant varieties like haworthia into north-facing pockets between larger rocks, where they will stay compact and healthy instead of stretching toward the light.
17. Container Rock Gardens for Patios Without a Yard
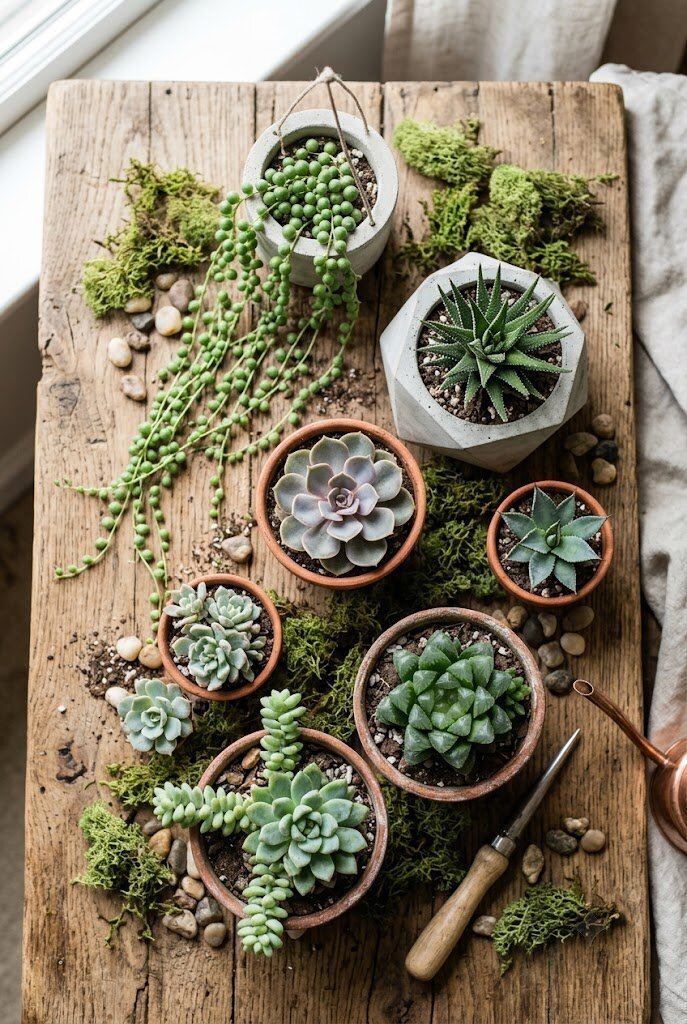
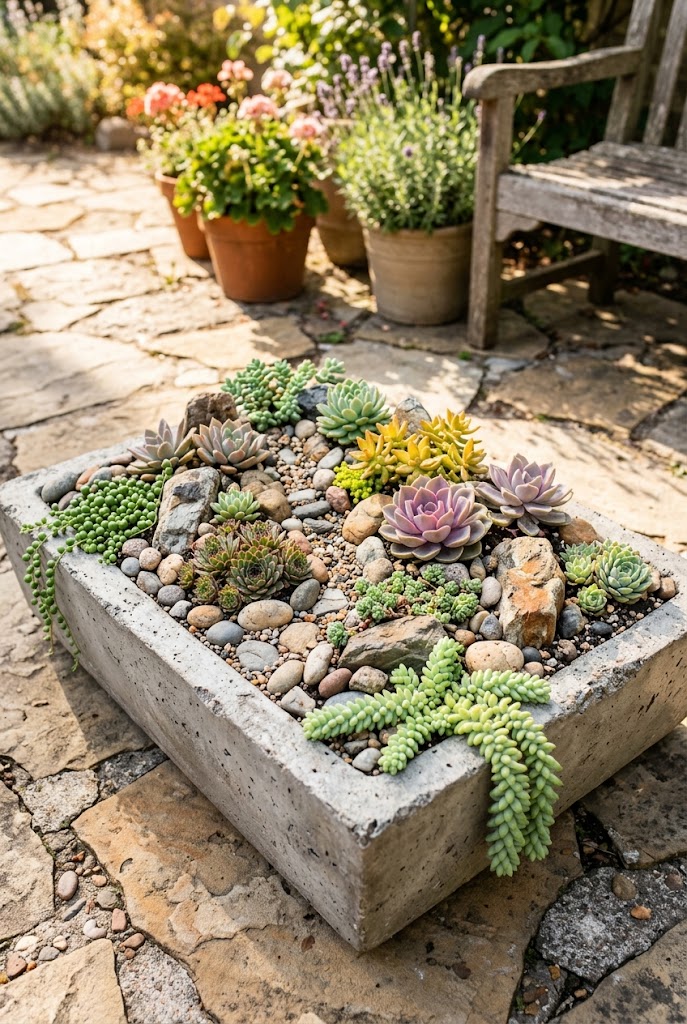
No in-ground space does not mean no rock garden. Build a miniature version in a wide, shallow container at least 14 inches across: layer drainage material at the bottom, fast-draining succulent soil above it, then arrange small stones and a mix of trailing and rosette succulents just as you would in a full-size bed. Container rock gardens are ideal for renters, balconies, and patios, and can be moved indoors or under cover before frost in colder regions, extending the range of plants you can grow.
18. Grow Light Tricks for Overwintering Rock Garden Succulents Indoors
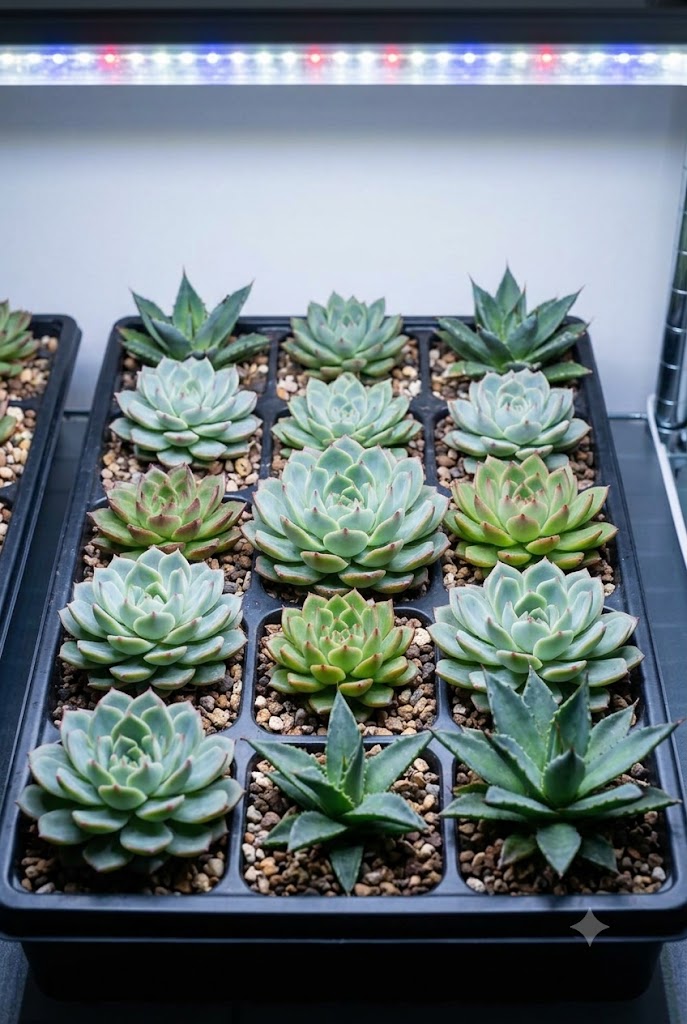
Tender succulents pulled from an outdoor rockery before winter often struggle indoors without enough light, stretching and losing their compact shape within weeks. A simple full-spectrum LED grow light, run 12 to 16 hours a day on a timer, keeps overwintered echeveria, agave seedlings, and other frost-sensitive varieties compact and colorful until they can return outside in spring. Position lights 6 to 12 inches above the plants and rotate trays weekly for even growth on all sides.
19. Ice Plant (Delosperma): Flowering Color Between the Rocks
Most rock garden succulents are grown for foliage, but ice plant (Delosperma) earns its place with an almost nonstop flush of bright magenta, orange, or yellow daisy-like blooms from late spring through fall. It spreads into a dense, weed-suppressing mat 12 to 18 inches wide, making it one of the best choices for covering bare gravel between larger stones quickly. Most delosperma varieties are hardy to zones 5 through 9 — far more cold-tolerant than most other flowering succulents — and need full sun and minimal fertilizer to perform their best.

20. Three Color Palette Combinations for Rock Gardens
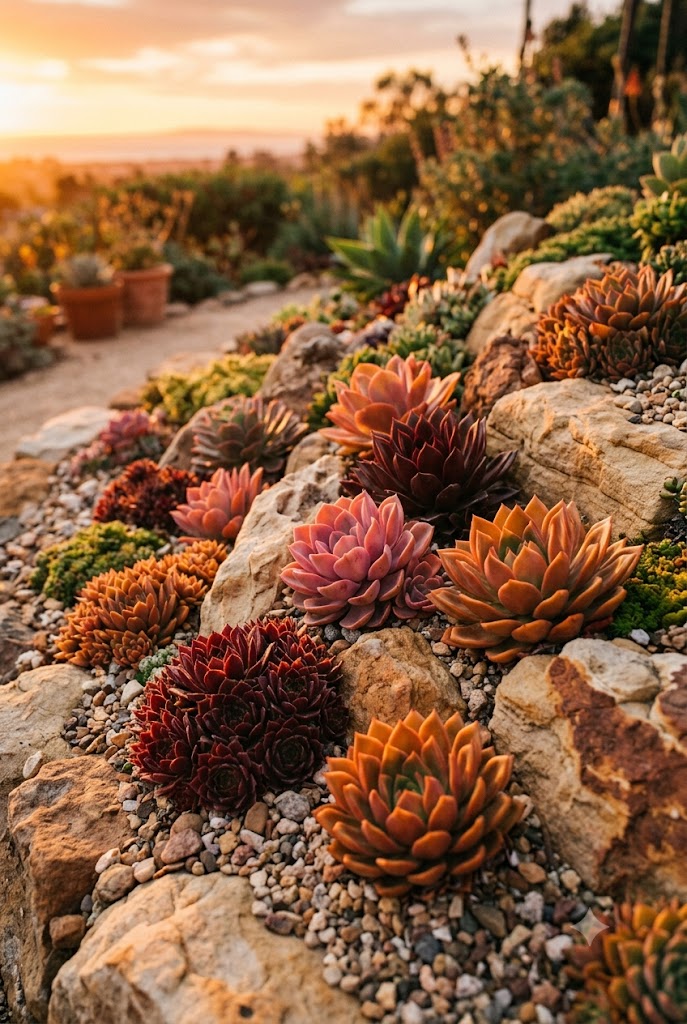
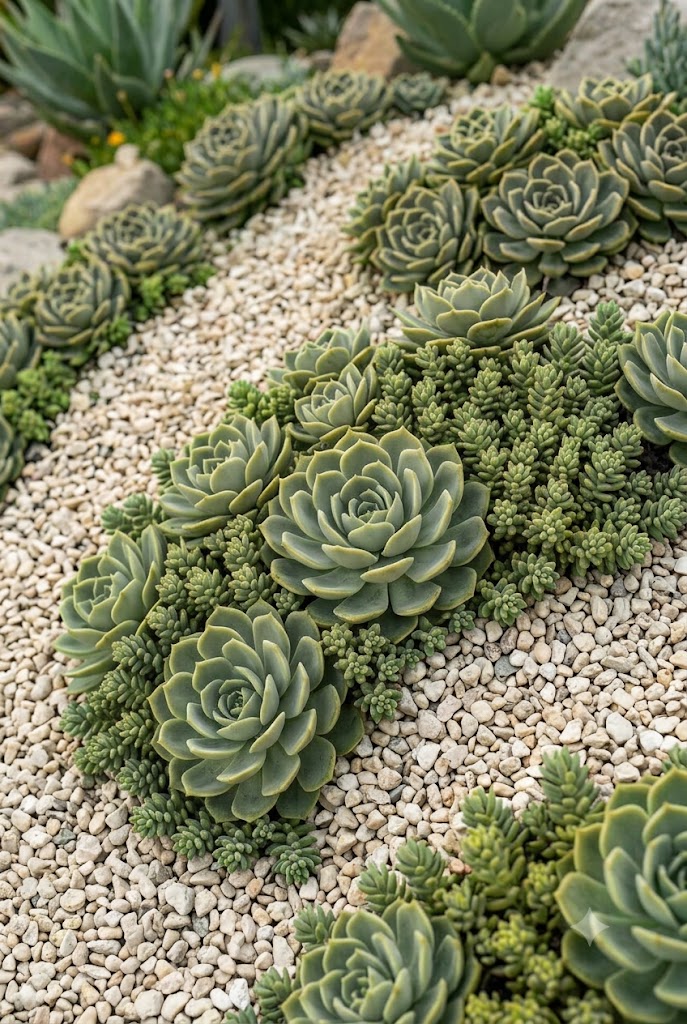
Color palette planning turns a collection of plants into a designed composition. A cool blue-and-silver palette pairs blue echeveria, powder-blue sedum, and gray stone for a calm, modern look. A warm sunset palette combines coral, burgundy, and orange-toned echeveria and sempervivum against tan or rust-colored rock for a striking, high-contrast bed. A green-and-texture palette skips bold color entirely and instead layers different leaf shapes and shades of green against pale gravel for a quieter, more sophisticated finish that works well in formal front-yard settings.
21. Cold-Hardy Rock Garden Plants for Freezing Climates
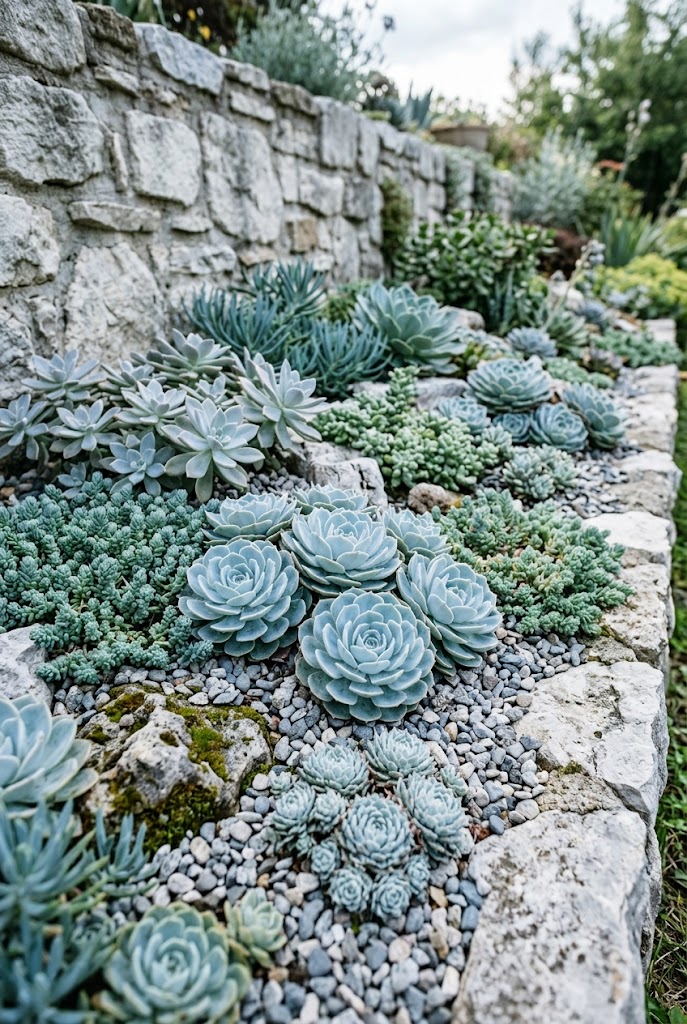
Gardeners in zones 3 through 6 are not locked out of the succulent rock garden trend. Sempervivum, hardy sedum varieties, and certain delosperma cultivars survive winter temperatures well below freezing and often look their most colorful after a cold snap triggers vivid red and purple stress coloring. Build cold-climate rockeries with extra drainage in mind, since freeze-thaw cycles in wet soil are more damaging to succulent roots than cold temperatures alone — a well-drained mound is even more critical here than in milder regions.
22. Desert-Style Rock Gardens for Hot, Dry Climates
In zones 8 through 11, a desert-style rock garden can use a much wider plant palette since frost is rarely a concern. Combine large barrel cacti, architectural agave, and full-sun echeveria with decomposed granite and warm-toned boulders for a low-water landscape that thrives on neglect. These gardens are especially popular in California, Arizona, Texas, and similar climates, where they often replace thirsty lawns entirely and can qualify for water-saving rebate programs offered by some municipal water districts.
23. Edging Ideas to Define the Rock Garden Bed
A defined edge keeps gravel from migrating into the lawn and gives the rock garden a deliberate, designed appearance rather than looking like rubble that wandered off a pile. Buried steel or aluminum edging creates the cleanest, most invisible border for modern designs. A single row of larger fieldstone set on its edge creates a more rustic, natural-looking transition. Whichever style you choose, make sure the edging sits slightly lower than the surrounding lawn grade so mowers can pass over it without catching.
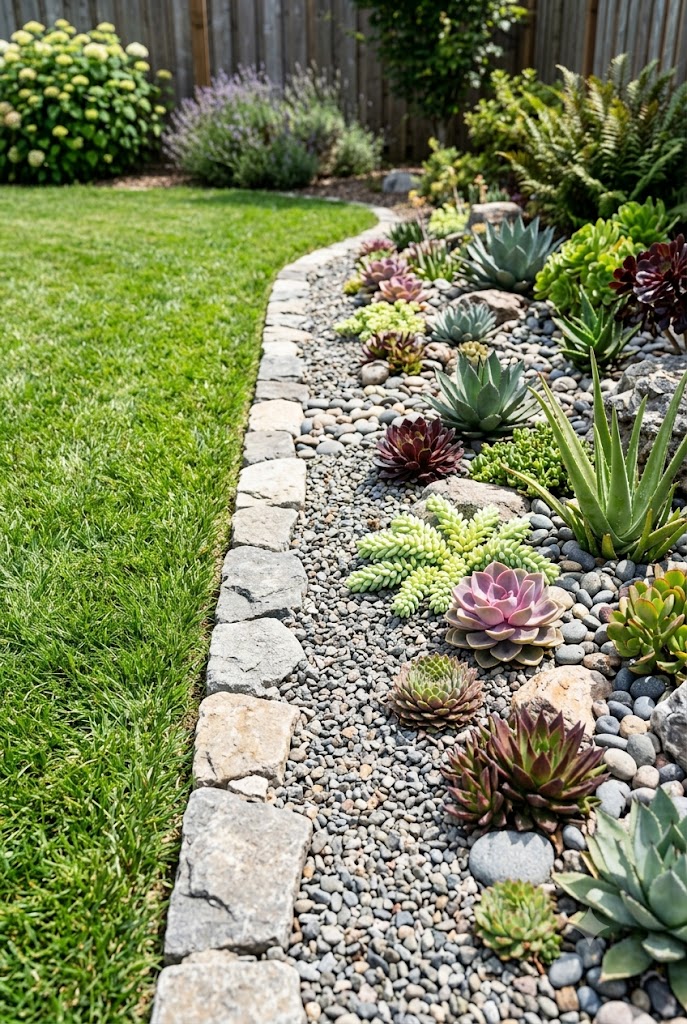
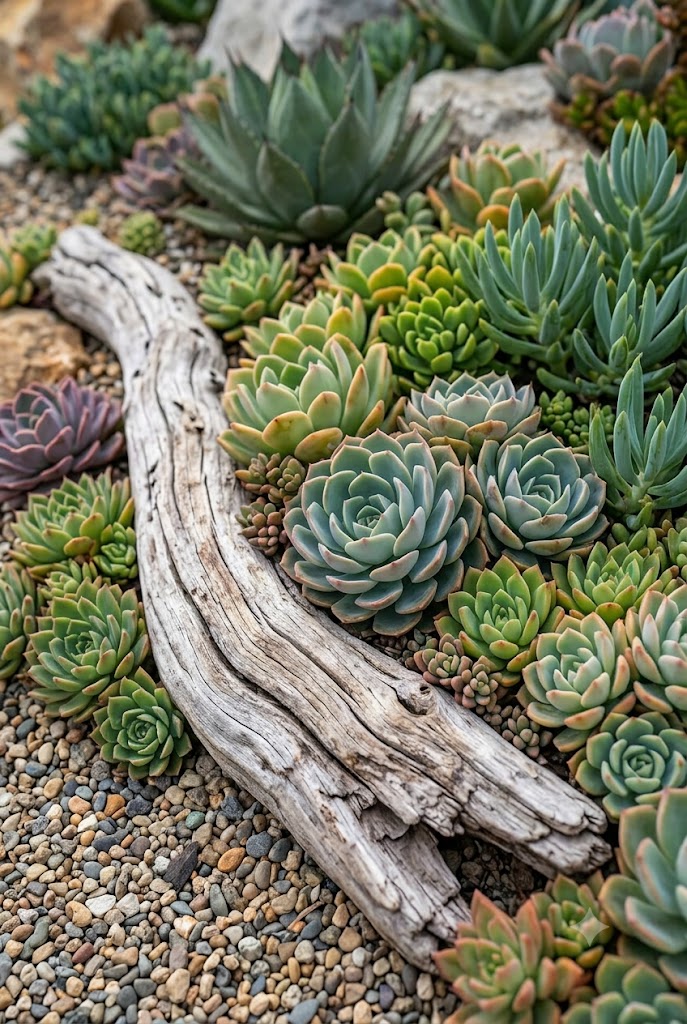
24. Adding Driftwood and Found Objects as Natural Accents
A weathered piece of driftwood, an old tree stump, or a found chunk of petrified wood adds organic warmth and breaks up the visual weight of an all-stone composition. Position driftwood low and partially nestled into gravel, the same way you would bury a boulder, so it reads as discovered rather than placed. This technique works especially well in coastal or naturalistic rock garden styles, where the soft, silvery wood tones complement gray stone and blue-toned succulents beautifully.
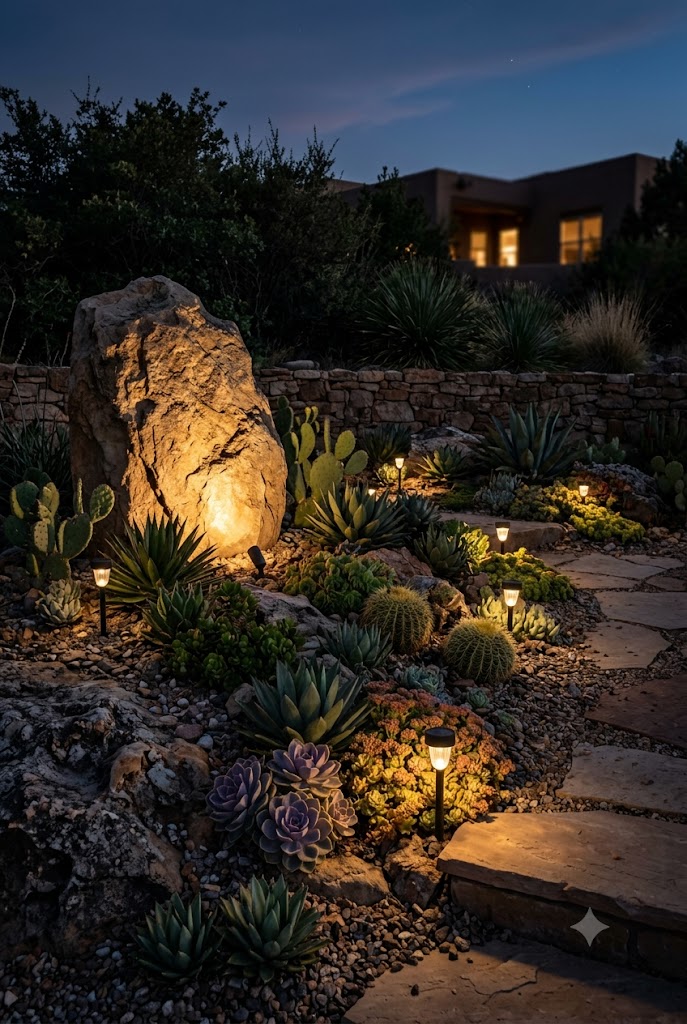
25. Lighting Your Rock Garden for Nighttime Beauty
Low-voltage solar or LED landscape lights placed among the rocks extend a succulent garden's appeal well past sunset and add a layer of safety along paths and slopes. Uplighting a single large boulder from below creates dramatic shadow and texture after dark, while small solar stake lights tucked between plants provide soft, ambient illumination without the glare of traditional floodlights. Position fixtures so the light source itself is hidden behind a rock, letting the glow rather than the fixture become the visual feature.
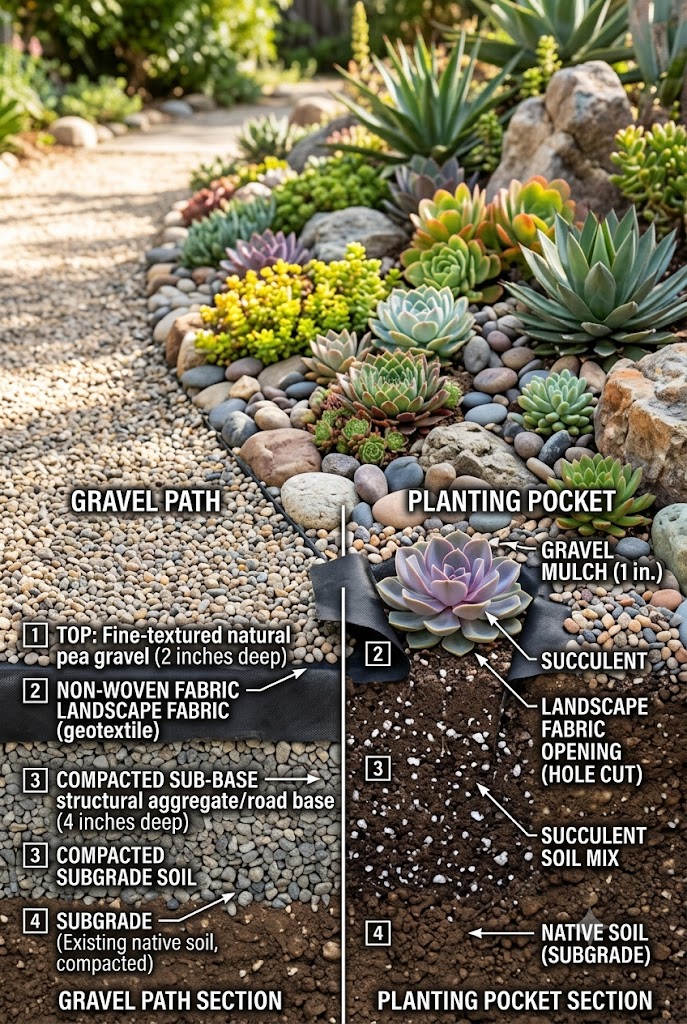
26. Landscape Fabric: Do You Really Need It Under the Rocks?
Landscape fabric is useful under purely decorative gravel paths and dry creek beds, where it blocks weeds with no plants to worry about disturbing. In active planting pockets, however, fabric can actually work against you over time — it restricts root spread for ground-cover succulents like sedum that need to root directly into soil as they spread, and it eventually clogs with windblown soil and sprouts weeds on top anyway. A better approach for planted areas is a thick gravel mulch alone, reserving fabric for the non-planted gravel zones of the design.
27. Watering a New Rock Garden During the First Year
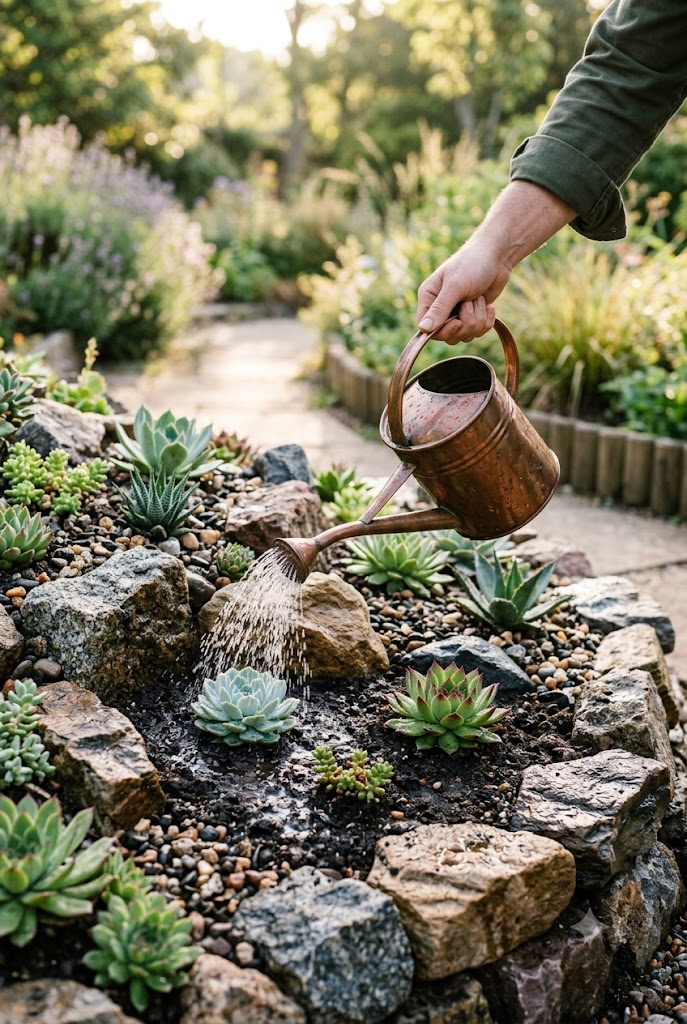
Even drought-tolerant succulents need consistent water while their roots establish in a brand-new rock garden, despite needing very little once mature. Water newly planted succulents every 5 to 7 days for the first six to eight weeks, soaking the soil deeply rather than misting the surface, then gradually stretch the interval as roots take hold. After the first year, most rockeries shift to the soak-and-dry pattern of mature succulents — watering only when the soil pocket has dried out completely.
28. Mini Rock Gardens for Small Yards and Front Beds
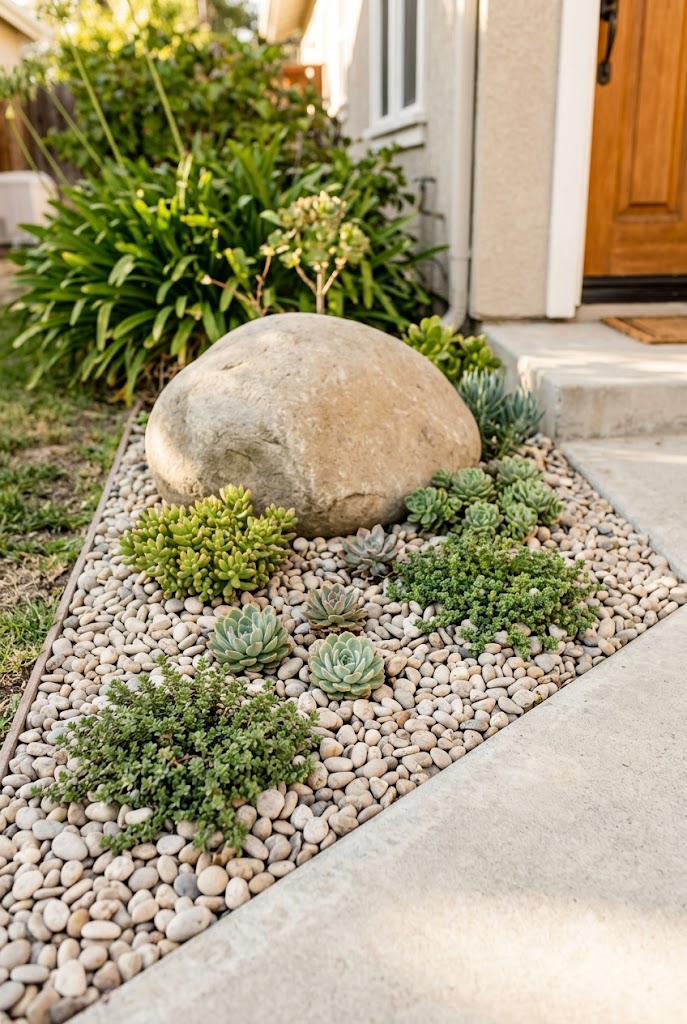
A succulent rock garden does not need a large yard to make an impact. A 4-by-6-foot mini rockery tucked beside a front entry, mailbox post, or narrow side yard strip can use the exact same principles — one anchor boulder, a few medium stones, and three or four succulent varieties — scaled down to fit the space. Smaller gardens actually benefit from a tighter plant palette; two or three repeated varieties read as intentional, while too many different plants in a small footprint can look busy.
29. Seasonal Rock Garden Maintenance Through the Year
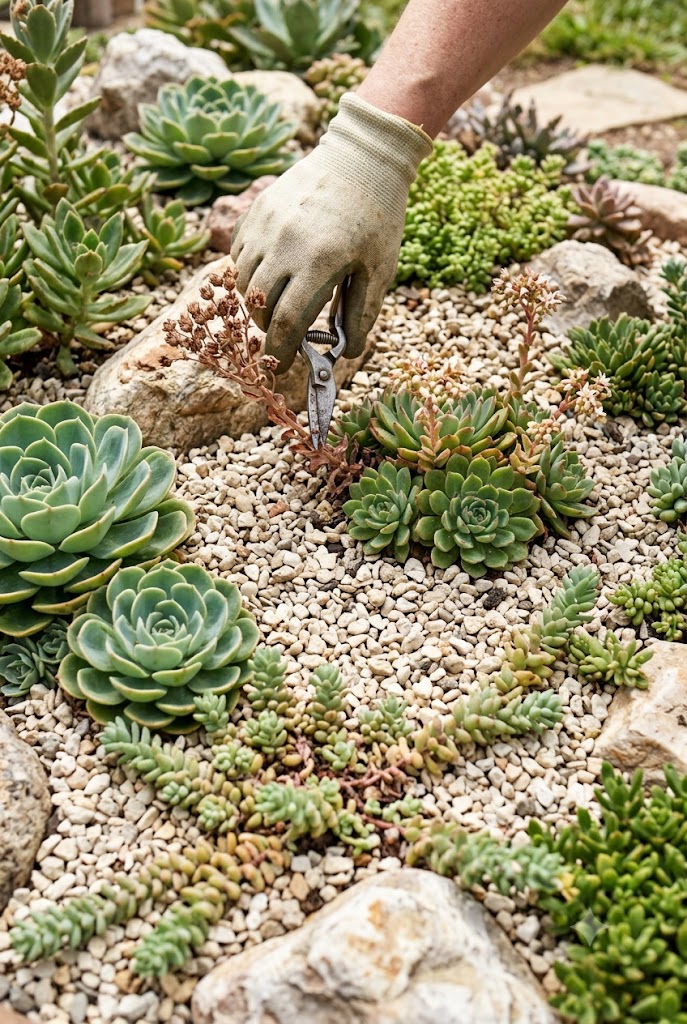
A mature succulent rock garden needs only light, seasonal attention rather than constant care. In spring, top off gravel mulch where it has thinned, divide and replant any sempervivum or sedum that has outgrown its space, and apply a light, half-strength fertilizer. In summer, water only during extended dry spells and watch for sunburned leaves on plants moved from shade. In fall, trim back any frost-tender growth and consider moving container succulents indoors. In winter, resist the urge to water dormant plants and let cold-hardy varieties handle freezing temperatures on their own.
30. Companion Plant Combinations That Thrive Together in the Rocks
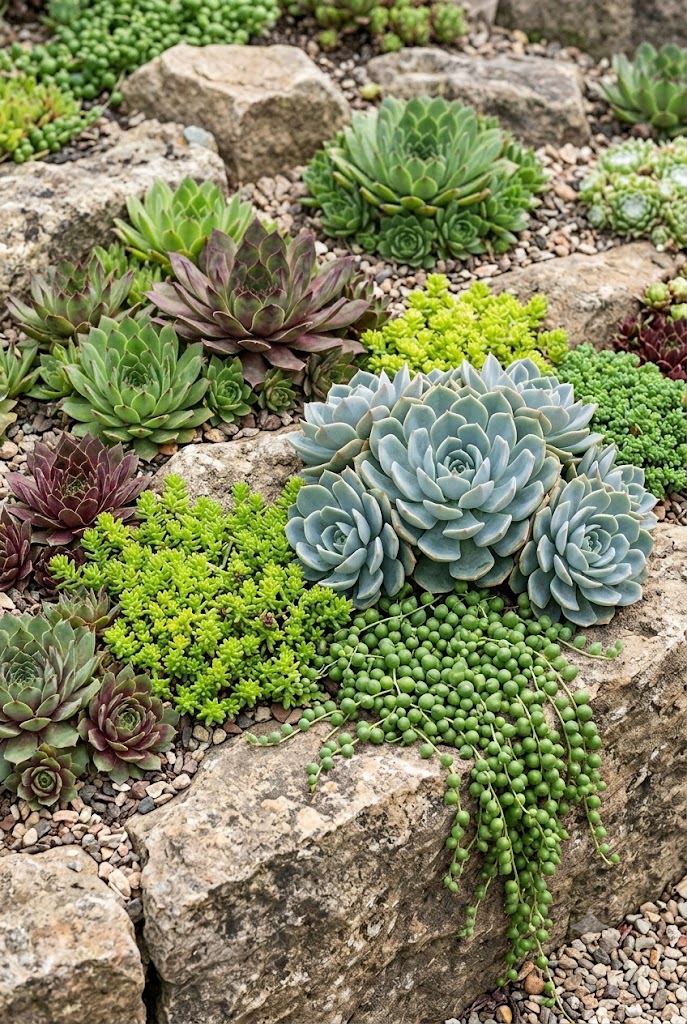
Grouping succulents by matching water and light needs, rather than by color alone, prevents the common problem of thirstier companion plants causing rot in their drought-tolerant neighbors. Reliable rock garden combinations include sempervivum with hardy sedum for cold climates, echeveria with sedum and a trailing string-of-pearls for warm container designs, and agave with barrel cactus and ice plant for full-sun desert beds. Sticking to these tested pairings takes most of the guesswork out of planning a rock garden that actually thrives long-term.
How to Build a Succulent Rock Garden: Step-by-Step Guide
Follow these steps in order for a rock garden that drains well and looks established from day one:
- Plan and mark the area: Outline the bed shape with rope or spray paint and confirm it gets at least 6 hours of sun.
- Clear the ground: Remove all grass, sod, and weeds completely, including roots, down to bare soil.
- Improve drainage: Mound amended, fast-draining soil 8 to 18 inches high to form a raised berm.
- Place large rocks first: Set boulders and focal-point stones, burying about one-third of each for a natural look.
- Add medium stones: Layer fieldstone or flagstone around the boulders to define planting pockets.
- Backfill with succulent soil: Fill remaining gaps with a 50–70% mineral, fast-draining soil mix.
- Plant from tall to short: Install architectural plants first, then mounding rosettes, then trailing ground covers along edges.
- Top-dress with gravel: Finish with 2 to 3 inches of gravel mulch, then water deeply once to settle everything in place.
7 Common Succulent Rock Garden Mistakes to Avoid
- Skipping drainage prep: Planting directly into flat, unimproved ground is the most common cause of rot in rock gardens.
- Lining up rocks evenly: Symmetrical, evenly spaced stones look artificial. Vary size, spacing, and grouping for a natural effect.
- Placing rocks on top of soil instead of into it: Unburied rocks look like they were dropped rather than naturally occurring.
- Mixing plants with conflicting water needs: Pairing thirsty plants with drought-tolerant succulents leads to overwatering one or rot in the other.
- Using standard topsoil: Regular garden soil holds too much moisture for succulent roots. Always amend heavily with mineral material.
- Forgetting gravel mulch: Skipping the top-dressing layer leaves the bed more prone to weeds and looking unfinished.
- Overcrowding small plants: Succulents need room to spread. Tight initial spacing often leads to crowding and rot within two seasons.
Walk the site at different times of day before building, since shade patterns shift more than most people expect — a spot that looks sunny at noon may sit in shade by late afternoon. When buying boulders, see them in person rather than ordering by photo if possible, since natural stone varies enormously in color and shape. Finally, resist planting everything at once: leave open gravel space for ground covers like sedum and ice plant to spread into over the first year or two, rather than overcrowding the design on day one.
Frequently Asked Questions About Succulent Rock Gardens
Conclusion: Building a Rock Garden That Gets Better With Time
A beautiful succulent rock garden comes down to three decisions made well: a sunny site with real drainage, rocks placed and buried so they look natural rather than arranged, and succulent varieties matched to your actual climate instead of someone else's. Get those three right and the rest of the design — color palette, pathways, lighting, seasonal accents — is simply a matter of personal taste layered on top of a foundation that will not rot, wash out, or need constant rework.
Unlike most garden styles, a rockery genuinely improves with age as ground covers spread, stress coloring deepens, and the stone weathers into the landscape. Start with the steps and ideas above, be patient through the first growing season while plants establish, and you will end up with one of the lowest-maintenance, highest-impact features any yard can have.